


2240 mm
1400 mm
1533 mm
8


381 mm
410 mm
195 mm
110 mm

300 x 300
1.5T

450 x 450
1.5T

450 x 450
12.5T

600 x 600
12.5T

600 x 600
40T

800 x 800
12.5T

800 x 800
40T

630 mm
600 mm
Domestic Use – 1 Kitchen Sink

630 mm
800 mm
Domestic Use – 2 Kitchen Sink

760 mm
800 mm
Domestic Use – 3 Kitchen Sinks

2225 mm
925 mm
1200 mm
Commercial Use


2315 mm
2000 mm
1725 mm
Commercial Use
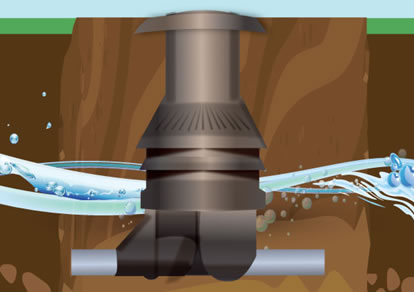
- Septic Tank
- Manhole
- Gully Trap
- GRP Manhole Cover
- Grease Trap
Waste water from toilet is diverted to the septic tank for its effective treatment and safe disposal through an absorption pit.
- 100% virgin material
- Reinforced structural base ring/ribs
- Can be supplied with watertight lid
- Easy to transport and install
- One piece rotationally moulded
- Rust and corrosion free
Average Waste-water generation per person – 180 Litres/day
Retention Time for Treatment and Reaction – 48 hours (2 days)
Volume Required for Treatment = Volume of Waste-water Generated.
Volume of Waste-water generated in 48 hours = No. of Person x Wastewater Generated Per Person x 2
For example: A family of 5 persons will require a 1,800 L Septic Tank (5 x 180 Lt x 2)
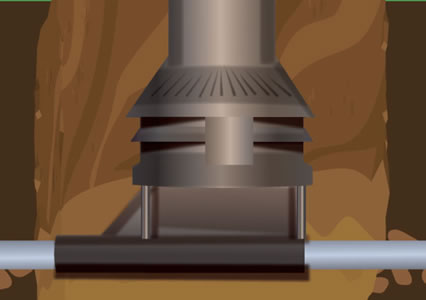
Waste-water (black water from Toilet) enters the septic tank through a 110mm diameter pipe on which a venting pipe (Air Vent) should be connected. For each flush, waste-water flows down through the pipe picking up oxygen through the air vent pipe.
As waste-water enters the septic tank, it is segregated in three segments:
Segment A – Upper part of the septic tank consists of Fats, Oil and Grease (FOGs). In this zone, aerobic bacteria gradually degrade the FOGs.
Segment B – Middle part of the Septic tank is the Aerobic zone consisting of suspended matter, oxygen and aerobic bacteria. In this segment, the organic matter is degraded to form Carbon dioxide and Water. Carbon dioxide diffuse out through the Air vent.
Segment C – Anaerobic zone consist of sludge (mixed of settled solid degradable organic matter and dead cells of bacteria) and anaerobic bacteria. In the anaerobic process, carbon dioxide, hydrogen sulphide, methane and water are formed. These gasses get diffused out through the air vent pipe. The treated water passes through the pre-filter basket into the absorption pit.
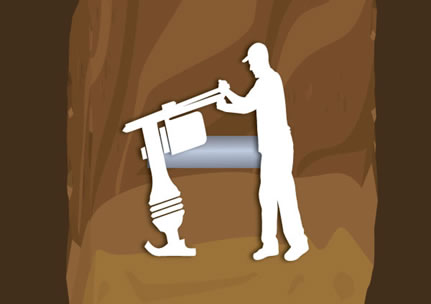
Dig to a depth that will provide a maximum of 300 mm of fine soil over the top of the Septic tank.
Allow 230 mm around the tank.
Allow for a minimum of 150 mm of compacted bedding material rock sand. Bed the rock sand and make sure the surface is levelled. Placed the septic tank on the levelled bed.
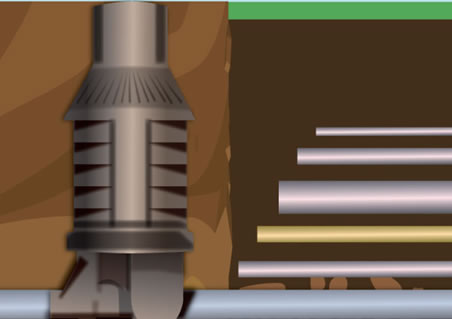
The septic tank is supplied with PVC sleeves [internal diameter 110 mm] at the inlet and outlet. The inlet and outlet pipes should be glued to the sleeves using standard PVC glue.
Ensure the tank lid is properly screwed on the tank manhole. Fill the tank with water through the inlet as you backfill, keeping the water level even with the backfill level. This will prevent possible distortion of the tank and its manhole. Do not remove the lid until the end of the backfill process.
Backfill in layers of 200 mm at a time and properly compact each layer. Ensure to compact each end first. Compact the backfill under the inlet and outlet before fixing the pipes.
Maximum backfill over the top is 300 mm. Mound fine soil over the top to provide positive drainage
NOTE: In case the septic tank needs to be installed with more than 300mm of soil above its top, it must be protected by a heavy-duty concrete slab. THE SLAB MUST REST ON FIRM SOIL AROUND THE TANK
In case the manhole screwed lid does not reach the ground level, a septic extension will be required. Install the extension to the manhole outlet before starting the backfill process. Make use of Duraco septic extension EXCLUSIVELY. The screwed lid supplied with septic will fit the septic extension.
The home sewer drain needs to slope at least ¼ inch per foot downhill to the inlet of the septic and the outlet pipe must cater for a downhill slope of 1/8 inch per foot to the absorption pit. The absorption pit should be at a distance of not more than 3 m from the septic and its volume must be at least similar to that of the septic tank.
- To keep a septic tank functioning properly, it is advisable to have the septic tanks pumped every five years.
- lf the septic tank has not been utilised for a long period, it is advisable to flush toilets several times to re-activate the aerobic process of the septic tank.
Failure to comply with the points below voids the warranty
- Do not install any tank in water saturated clay or in high water table. The tank may collapse and its content will escape.
- Tanks are not fire-resistant. Do not store them near an open flame or heat in excess of 180°F,
- Do not install any tank under the path of vehicles or heavy equipment unless protected by a heavy-duty concrete slab, without resting on the septic tank.
- When the septic tank is pumped for normal maintenance; it should be refilled immediately.
- Our septic tanks are designed for underground use only.
- Protect the tank from sharp objects which could cause leakage.
- Avoid abusive use of detergent
What base is required to install a septic tank?
For our septic tank NO concrete base is required. The tank just has to be placed on a 150 mm rock sand bedding.
Do you provide warranty on your septic tanks?
3 years Warranty
Can I install a septic tank under a driveway?
No, installing the septic tank under a driveway is not permitted and will void the warranty.
In case it is located under the driveway, or in the pathway of heavy vehicles, the tank MUST be protected by a reinforced concrete slab that rest on firm ground. The septic tank should NOT support the load of the concrete slab. A riser will then be adapted at the septic tank manhole to reach ground level.
Can I build over my septic tank?
It is not recommended to build over the septic tank. Access to the tank is necessary for inspection and maintenance. Anything built over the tank would have to be removed for pumping and repairs.
What are the advantages of Duraco Septic Tank compare to concrete septic tank?
- Concrete can Crack Over Time
- Higher Risk of Contamination
- More Expensive
- Involves Complicated Installation
How long does the septic tank last?
Septic systems are designed to provide long-term, effective treatment of household waste when operated and maintained properly. However, most systems that fail prematurely are due to improper maintenance.
What should and should not go into my septic tank?
The best situation for a septic tank would be that only human wastewater enters the tank. This includes proper toilet tissue.
Can a septic system be repaired?
Yes. Depending upon the problem, a repair is possible.
What is considered a proper maintenance of my septic system?
Maintaining your septic system requires regularly pump outs and satisfactory bacteria presence to aid in the digestion of organic solids. Neglecting proper maintenance will result in system distress and ultimately, system failure.
How often should my septic system be pumped out?
It is recommended to have the system pumped out every 3 to 5 years depending on the size of your household
What is an aerobic wastewater treatment unit?
An aerobic system allows for biological (oxygenated aerobic bacteria) to decompose organic waste. This method differs from the traditional septic tank which uses anerobic bacteria to breakdown the organic waste. The introduction of oxygen is then done through either a biological solution using bacteria and enzymes or with a mechanical system that pumps air in and agitates the mixture.
What is the difference between aerobic and anerobic?
There are two types of bacteria. One is anerobic which is the type found in a traditional septic tank. The bacteria break down the solid waste in this closed environment of the tank without oxygen. The second type of bacteria is aerobic which uses oxygen to break down the solid waste.
Is the aerobic system better than a traditional septic tank?
The aerobic system breaks down the waste water materials much better than the traditional septic tank. The resulting effluent water discharge is far cleaner and better and safer for the environment.
What is the aerobic advantage?
Basically the aerobic method of treating household wastewater is that it breaks down a higher percentage of solids before discharge into the leach field or environment. A second advantage is that it breaks down the waste much faster than the traditional septic system.
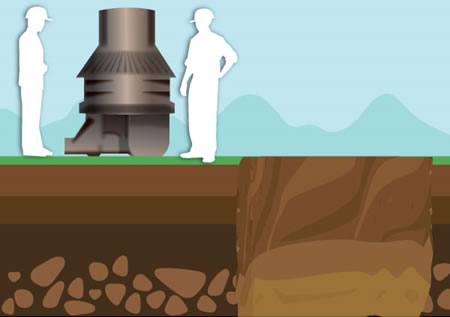
A manhole or an Inspection Chamber is a vertical access chamber from the ground surface to the sewer network or other underground utilities.
- Tight
- Hydraulic profile
- Universal joining
- Handy
- Resistant
- Imputrescible/rotproofTight
- Universal joining
The Manholes must be installed in accordance to WMA “Best Practice Paper”. The following major steps are involved during the installation.


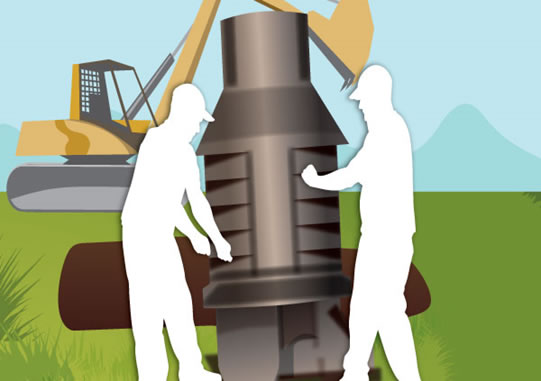
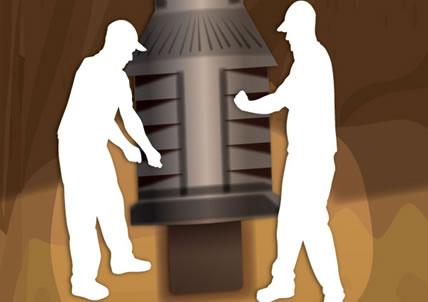
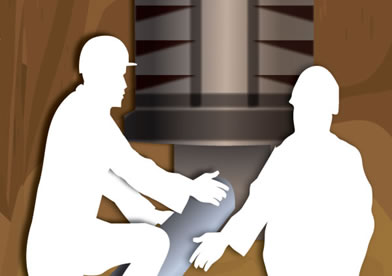
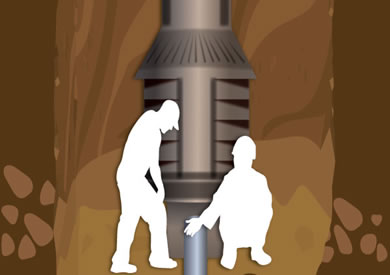
For technical details and guidance on the installation procedure, please contact Duraco.
The following precautions should be taken:
- Residents of the housing units should not tamper with the manhole.
- No constructions or extensions to existing building should be allowed within 1 metre of any manhole.
- No loading of whatever type should be allowed on manhole.
The sewer manhole should NOT be used in the following site conditions:
- Where numerous 90º elbows may become necessary within the household property connection pipework to fit into the fixed benching and haunching of the manhole.
- In cases of high water table – which may cause uplift. The minimum distance between the bottom of the manhole and the water table shall be 1.2 metres
- In marshy lands
- At old sites of cesspits and leaching fields – where compaction to the standard conditions cannot be ensured.
A manhole or an Inspection Chamber is a vertical access chamber from the ground surface to the sewer network or other underground utilities. Manholes are usually positioned at a junction to allow cleaning, inspection, connections, and repairs.
By definition, an inspection chamber is a drainage or sewerage fitting used to connect drainage or sewerage installations. It also serves the purpose to change the direction of drainage or sewerage runs, which terminates at ground level with a riser shaft of 200mm minimum outer diameter and an inner diameter of less than 800mm.
Whereas, a manhole is a drainage or sewerage fitting used to connect drainage or sewerage installations and/or to change the direction of drainage or sewerage runs, which terminates at ground level with a riser shaft of 800mm minimum inner diameter.
In general, manholes or inspection chambers should be provided in the following situations:
1.At all changes of direction on drains.
2.At all changes of gradient on drains.
3.At all drain junctions where cleaning is not otherwise possible.
4.Within 12m between two drains
5.At all changes in pipe diameter
Inspection Chambers are not large enough for man-entry but allow the drain to be reached from ground level. The European Norm EN13598/1 provides for Inspection chambers 475mm and 600 mm up to a maximum depth of 1,250 mm and are known as shallow inspection chambers. The chamber is capped with a PE covers for pedestrian area.
The European Norm EN 13598/2 provides for manholes 800mm and 1000 mm diameter. These manholes are large enough to allow for man-entry and make allowances for rodding and clearance while standing on the benching. The EN 13598/2 provides specification for manholes in traffic areas and deep underground installations. Duraco can supply manhole of diameter 800 mm and 1000mm at height and specification recommended by EN 13598/2.
Once installed, these plastic units will allow for effective rodding, cleaning and inspection, without compromising operator safety. It is extremely durable and resistant to attack by sulphates in the soil.
NOTE: When installed in traffic roads, the Manholes must be equipped with a reinforced concrete ring which fits around the access shaft and rest on firm ground around the manhole. A GRP or ductile iron manhole cover with a load ability of D400 should be fixed on the concrete ring.
Its one-piece molded design as well as its rubber joining device gives the chambers a complete tightness in the ground up to a height of 1250 mm for Inspection Chambers and 2000mm for Manholes over the stream.
The Chambers base has an integrated slope, in accordance with EN13598/1 and EN13598 /2, which is perfectly in keeping with the hydraulic profile of sewerage systems.
The Chambers range allows the connecting of PVC pipes with a various range of standard pipe sizes in diameter, starting from 110mm. Moreover, angular bypass pipes can be connected with the help of rubber joints. For technical advice, kindly contact Duraco.
Due to its light weight, the Chambers can be easily handled for installation on site. They can be installed by hand, without the use of lifting gear or other machinery. Besides, its cast-in-one-piece design makes the manhole adapted to fit into most environments.
It is molded with horizontal and vertical strengthening ribs, which provides a perfect stability and strength, meant to fit in its environment. This distinctive feature enables it to withstand static and dynamic loads of hardcore as well as the pressure of the ground. (MSB test results for our manhole are provided upon request)

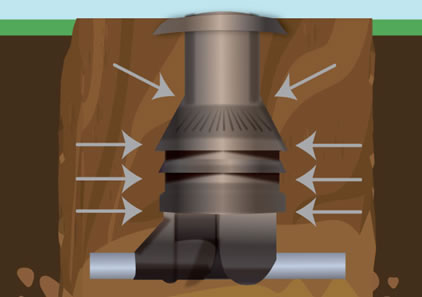
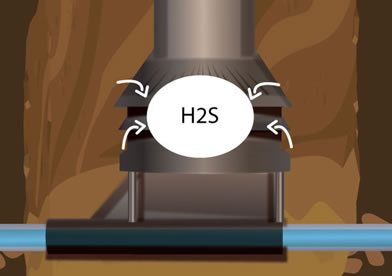
Endowed with the quality and physical properties of the High-Density Polyethylene, Duraco manholes are not affected by chemical agents such as hydrogen sulphide (H2S) and do not need any specific maintenance. Kindly contact us for more technical details.
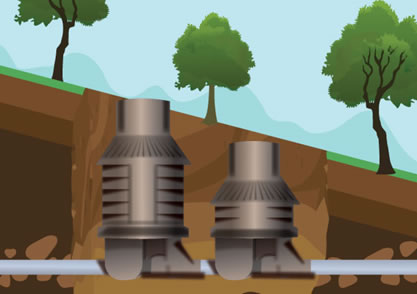
A gully trap is a plumbing device that is buried in the ground to receive wastewater from your bathroom and laundry before it is emptied into the sewer main or absorption pit.
- Prevent foul odors
- Prevents sewer gases
- Prevent storm water
Because of its shape, the trap retains a small amount of water to prevent foul odors of the sewer reaching the surface. The water in the trap creates a seal that prevents sewer gases from passing the drainpipes back into the occupied space of the building.
The top or surround of the gully trap is raised above ground level to prevent storm water and other foreign matter entering the sewer.
With a better performance than cast Iron, Duraco GRP (Glass Reinforced Fibre) manhole cover is made of RUST PROOF and UV resistant material.
- Made up of Glass fiber, Resin & Quartz
- Load ability as per BS EN124 Standard
- Quality assurance by ISO 9001: 2008
- Zero Scrap Value – Burglar Proof
- Resistance to Corrosion
- Can be carved with personalised logo
- Temperature resistant
A Grease trap is a plumbing device which intercept fats, oil, grease, and solids (fogs) from the kitchen sink before they enter the sewer network or an absorption pit.
- Made of 100% virgin Polyethylene.
- Placed underground to avoid odours
- UV stabilised screwed lid.
- Available in six capacities
- Colour: Black
Common wastewater from the kitchen sink contains small amounts of Fats, Oil, Grease and Solids (FOGS) which enter grease trap. The solid food particles sink to the bottom while the lighter grease and oil floats to the top and form a floating scum layer. The latter is very slowly digested and broken down by the microorganisms during the aerobic digestion process.
The relatively grease-free water is then fed into an absorption pit. The food solids at the bottom and floating oil and grease must be periodically removed. A traditional grease trap is not a food disposal unit. Unfinished food, gravy and sauces must be scraped into the garbage or food recycling bin.
Respect the following steps when installing a Duraco grease trap:
Step 1: Location: –
Determine a suitable area to install the grease trap. The unit must be place in an outside area near the kitchen sink and accessible enough for regular maintenance.
Step 2: Connection: –
The Grease trap has only two connectors. The inlet should be connected to the sink pipe and the outlet to the absorption pit.
Step 3: Excavation: –
Dig to a depth that will allow the grease trap cover to come flush with the ground.
For domestic models (140, 200 and 350 L) allow 160mm around the tank. For industrial models (1,800, 3,000 and 4,700 L) allow 230 mm on both sides and both ends of the tank.
Step 4: Bedding: –
Allow for a minimum of 150 mm of compacted bedding material rock sand. Bed the grease trap and make sure it is placed levelled.
The grease trap is supplied with PVC sleeves at the inlet and outlet. The inlet and outlet pipes should be glued to the sleeves using standard PVC glue.
Step 5: Backfilling: –
Ensure the tank lid is properly screwed on the grease trap. Fill the tank with water through the inlet as you backfill, keeping the water level even with the backfill level. This will prevent possible distortion of the tank and its manhole. Do not remove the lid until the end of the backfill process.
Backfill in layers of 200 mm at a time and properly compact each layer. Ensure to compact each end first. Compact the backfill under the inlet and outlet before fixing the pipes.
For the industrial models, the maximum backfill over the top is 300 mm.
NOTE: In case the grease trap needs to be installed with more than 300mm of soil above its top, it must be protected by a heavy-duty concrete slab. THE SLAB MUST REST ON FIRM SOIL AROUND THE TANK
Step 6: Polyethylene (P.E) Extension: – (for industrial models ONLY)
In case the manhole screwed lid does not reach the ground level, a polyethylene extension will be required. Install the extension to the manhole outlet before starting the backfill process. Make use of Duraco extension EXCLUSIVELY. The screwed lid supplied with grease trap will fit the P.E extension.
Step 7: Drain Field Material: –
The home sewer drain needs to slope at least ¼ inch per foot downhill to the inlet of the grease trap and the outlet pipe must cater for a downhill slope of 1/8 inch per foot to the absorption pit. The absorption pit should be at a distance of not more than 3 m from the grease trap and its volume must be at least similar to that of the grease trap.
Failure to comply with the points below voids the warranty.
- Do not install any tank in water saturated clay or in high water table. The tank may collapse and its content will escape.
- Tanks are not fire-resistant. Do not store them near an open flame or heat in excess of 180°F,
- Do not install any tank under the path of vehicles or heavy equipment unless protected by a heavy-duty concrete slab, without resting on the grease trap.
- When the grease trap is pumped for normal maintenance; it should be refilled immediately.
- Our grease trap is designed for underground use only.
- Protect the tank from sharp objects which could cause leakage.
- Avoid abusive use of detergent.
How do I dispose of the grease from the trap?
For Grease trap 1800L and above, it is recommended to contact a Wastewater Company to pump and dispose the grease accordingly. For Domestic Grease Trap, it can be discarded by scraping the Fats, Oil and Grease and disposing it in a sealed biodegradable plastic bag as solid wastes.
Where is the grease trap water disposed of?
Wastewater should be disposed to the absorption pit.
What happens if you do not install a grease trap?
If you do not install a grease trap, the grease will harden in your pipes causing major blockage problems. It is much easier and cost – efficient to install a trap than to avoid it.
How often should I clean my grease trap?
Domestic Grease Trap should be cleaned on a weekly basis. If grease traps are more than 50% full when cleaned weekly, then clean them more frequently.
Does a grease trap prevent blockage?
Blockage will occur if the trap is not cleaned often.
Do I still need a grease trap if we do not generate any grease?
Yes. A grease trap not only collects grease, but also removes fats and oils, such as:
- fats from butter, margarine, shortening and mayonnaise,
- cooking oil,
- salad oil,
- grease from cooking or baking.
Occasionally my grease trap will back up and overflow, why does this occur?
If grease traps are not maintained and cleaned on a regular basis, there will be a build-up of F.O. G’s and sludge which will cause blockage and pipe damage.